|
Oil Wash for cockpits |
||
|
(and other areas) |
||
|
||
|
|
|
Oil Wash for cockpits |
||
|
(and other areas) |
||
|
||
|
|
|
|
 |
| Photo of Daryl's finished 1/48 NeOmega cockpit |
|
|
|
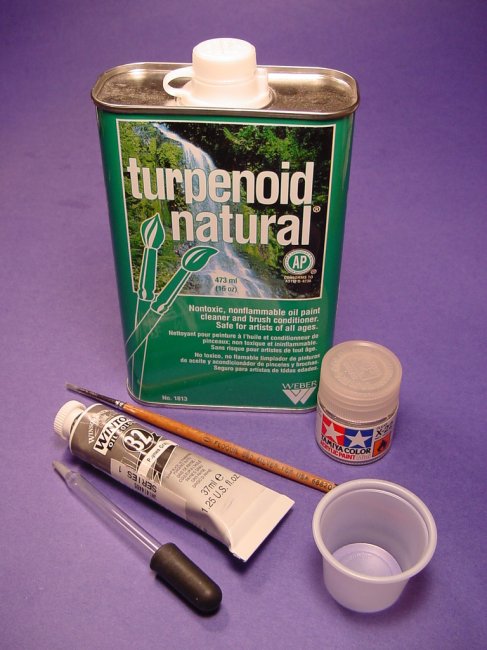
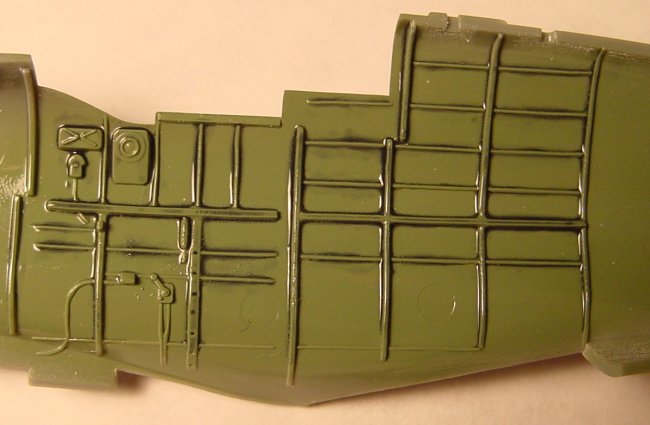
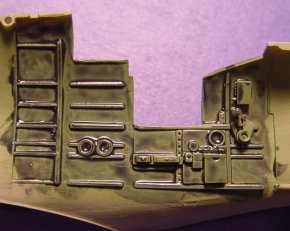
In-progress photos by Steve Bamford Here is a scan of the 1/48 NeOmega cockpit I have "underway". (In quotes, the kit is dead). How to Weather Your Model Airplane, one Method Discussed Weathering is a topic of much confusion, dispute, and challenge. It is also one of the highlights of model building often separating great kits from ones that are spectacular. The following few tips may assist model builders in successful weathering. While there are many ways to weather a kit, this method has proved the most successful and trouble-free for me.
The
Tamiya gloss will serve as an
armor plate against the drubbing the kit will be getting
a little while later on. It
is very critical that the Tamiya clear cure for at least 24 hours.
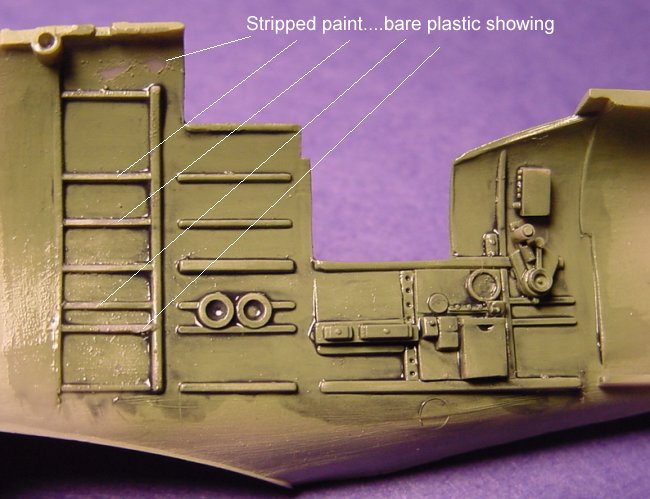
48 hours is better. If
the clear coat is inadequately cured, you’ll wind up stripping paint off and
having to begin all over. DOH! Note from Steve Bamford: I also tried Future as a barrier on another fuselage half and it was stripped by the Turpenoid slightly faster that the Tamiya clear.....but only slightly. I found the wash flowed just as well on the Future coated cockpit sidewall as it did on the Tamiya coated cockpit sidewall. The turpenoid should be used sparingly to avoid too much of it as this will soften the clear coat and the underlying paint.
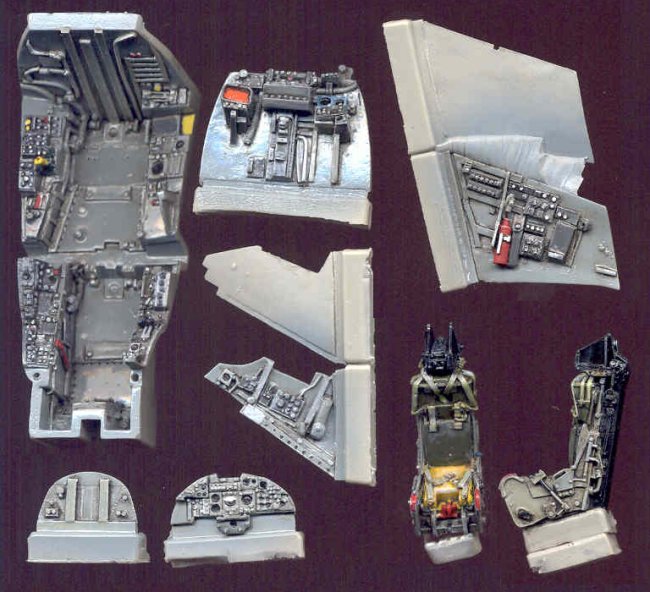
I always do cockpits with much more color than the real aircraft. I make the shadows much darker than I would on the outside of the airframe and make the highlights much whiter. Why? It is very dark inside a models cockpit and I want to tell your eyes that there is a lot of detail in there. If you look at the bright yellow part of the Buccaneer cockpit tub, it'll fit right under the red fire extinguisher. You'll be able to see it in the cockpit. In real life, both are grey....and in scale you'll likely miss it. Your eyes will say " I see detail " and then glaze over. With the dash of color here and there, your eyes will say " I see a fire extinguisher." That is better in my opinion.
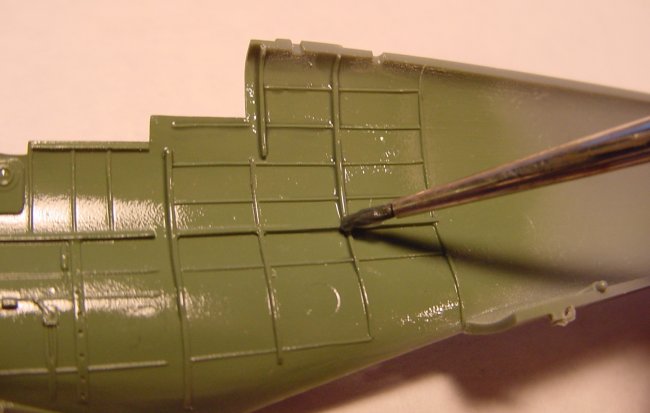
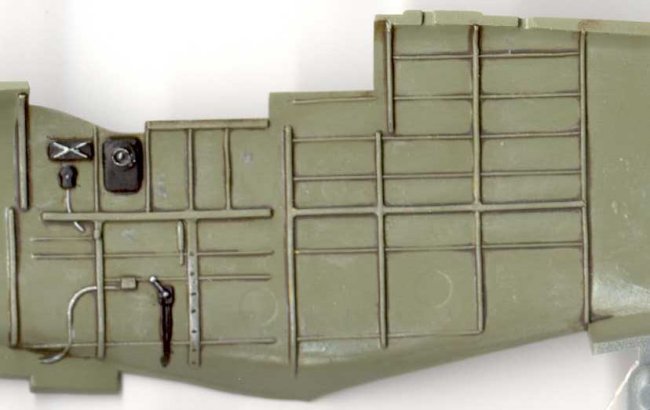
My airframe washing is very
similar, but the contrasts are much more subtle to avoid "patchwork"
images. After following the enamel (with subtle highlights)/Tamiya
gloss/subtle burnt umber & base-shade wash, I flat coat with
PolyScale Clear Flat and then use Carre brand pastels for oxidized paint.
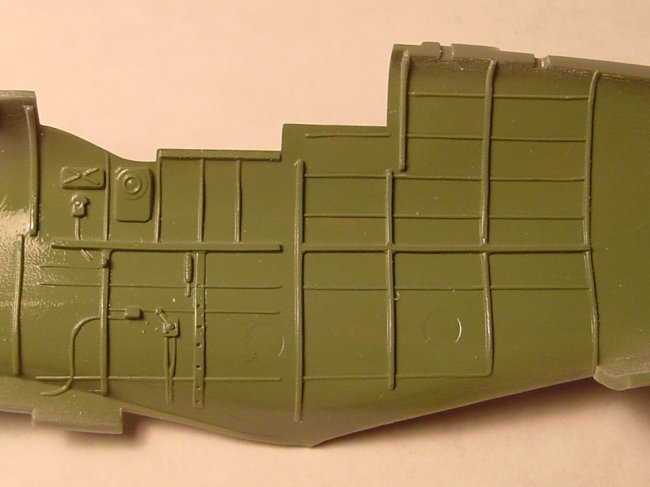
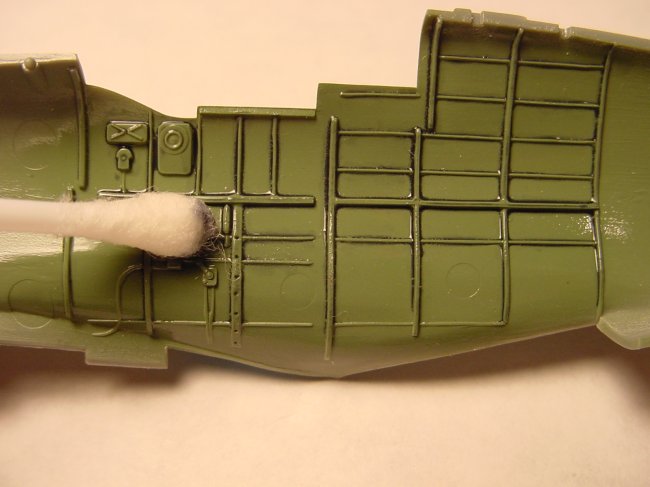
Disclaimer from Steve Bamford: The in-progress photos in this article were taken by Steve Bamford and were not picture of Daryls Spitfire fuselage part, so the in-progress photos may not 100% appear to be the same level of wash as the finished Spitfire photo above. Further Disclaimer from Steve Bamford: The in-progress photos do not include any detail painting. The detail painting can either be done BEFORE the clear acrylic gloss coat before the wash or the detail painting can be done after the wash. For the in-progress photos, I skipped the detail painting in an effort to focus the full effect of the photos on the wash being discussed in this article. Some common errors include: 1. Flooding the entire kit with the wash.
2. Removing base coat color
3. Wash is too dark.
4. Wash turns into particles instead of being an even color
Bonus tip: Use too much
bright color in a cockpit. In
reality, it’s not there, HOWEVER……you want people to notice details.
This will help it stand out. One
of the very unusual things about our eyes is that we begin to “color
fatigue” after only 2 or 3 seconds.
What this means practically to one’s modeling is that the viewer of
your kit will not notice your hard, excellent work.
With a dab of color here and there, the detail “pops” right out at
them. It works at
contests. :-) Bonus tip: Pastels make excellent final weathering touches. Sand the chalk with 80 grit sandpaper to get a powder or use an X-Acto knife to shave powder from the side of the pastel powder stick and apply with a soft brush (or even a Q-Tip cotton swab in some instances where you want a thicker application of the pastel powder covering a larger area....such as exhaust stains). Keep a spot or two free of pastel so the model can be touched without the risk of fingerprints. Bonus tip: When
weathering with an airbrush, don’t limit the “oxidized” paint to inside
panel-lines. Bring it over panel
lines and completely to the edge of the color being shaded.
It avoids the “patchwork kit” look.
The weathering with oils will represent your panel lines adequately. Bonus tip: Experiment.
Experiment. Then
experiment. It’s all artwork. :-) Enjoy!!!! Dr. Daryl Johnson
Daryl Johnson
|
|
Photos and text © by Daryl Johnson
|
|