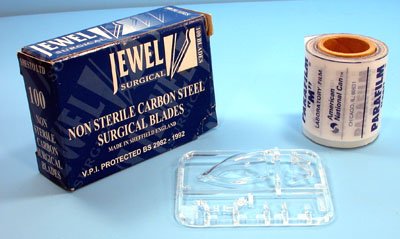
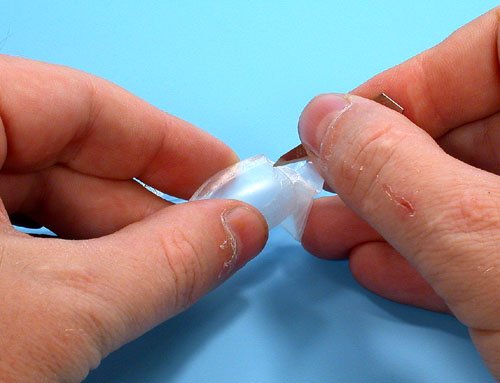
| Masking
begins by cutting a piece of Parafilm off the roll (this piece is about
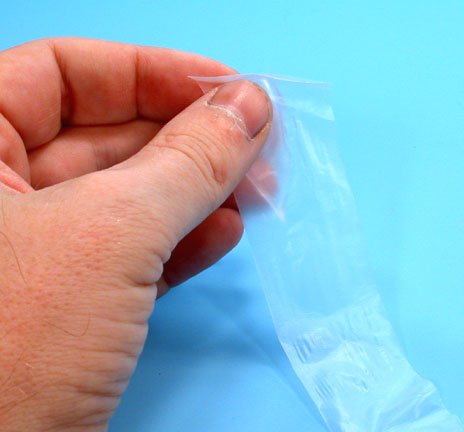
1/2 wide). The paper wrapper is removed and the Parafilm is stretched out.
This stretching makes the film much thinner and very rubbery. I normally
try to keep the side that was covered by the paper toward the plastic, but
I am not sure it really matters which side you use. It seems to work
regardless. |
|
The
stretched out film is draped over the canopy. Do not try to put this stuff
on like you would tape. Do not try to follow panel lines, or stretch it to
make it conform and follow lines. If you do this - you will not like the
results as the film will pull up and away - usually while painting..
DRAPE the film on and carefully press it into
place on the part. Normally I do one side of the canopy, then the other if
the film doesn't fit over the whole canopy. |
|
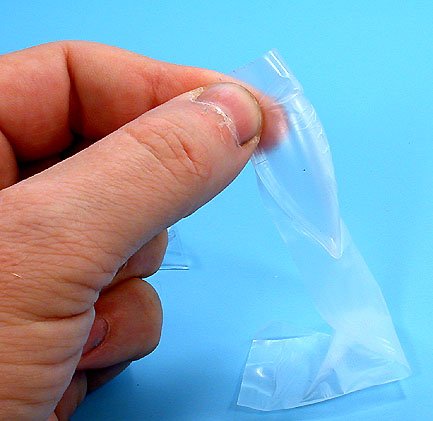
The
other critical thing as that more than one layer be placed on the canopy.
So after the first layer is in place - cut another piece of film and
repeat the procedure of stretching, and draping the film to cover the
first layer.
I normally only use two layers - but if using
something hot, like heavily thinned enamels or lacquers, I go ahead and do
three layers of film. |
|
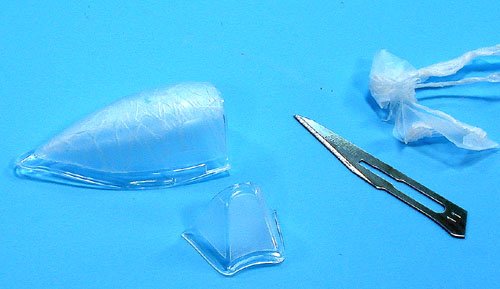
| Once
the layers are in place, I take a new blade and hold it between my fingers
to cut the canopy frames. I find that the scalpel is so sharp that it only
needs the smallest of pressure to score the lines. Holding the blade in my
fingers gives me terrific control. I have no trouble at all masking very
complex frames, or frame that have complex curves. I have even masked the
canopy on a 1/100 scale B-52 without any trouble. |
|
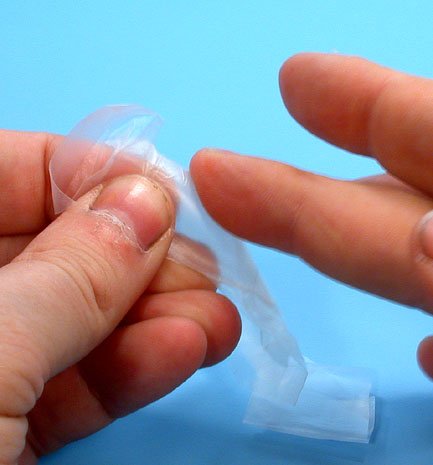
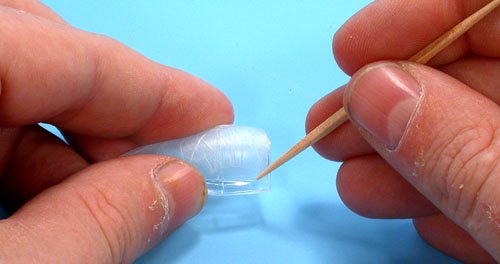
| Again
- don't worry about getting the whole canopy at one shot. I build up the
layers on a side, cut it out then do the top, then the other side. Once
the frames are cut free, of one needs to touch up, the Parafilm is very
rubbery and is super easy to push around with the edge of a toothpick.
This is how I am able to do the fine rounded corners such as are on an
F-86 windscreen without much fuss. I cut the film square and push it
(using my toothpick) into the rounded shape. |
|
|
Here
is the finished canopy - it took me about 10 minutes to do the whole
thing. That is because this is a very easy canopy - but this Parafilm
masking works great and is a fast, efficient, and effective way to mask
every sort of canopy. It even works great on vac canopies.
Also
- it doesn't matter if you future your canopies or not - the Parafilm
doesn't react with future (as long as it's dry of course). |
|
As
to attaching windscreens - that doesn't really matter. I USUALLY use something
called crystal watch cement (also available from www.micromark.com). This stuff
is superior for attaching canopies (usually). If I have a canopy that has no
frame where the clear part attaches to the fuselage (such as the Tamiya P-51)
then I use something I call "future goo"
this goo is gelled future. I discovered it accidentally
about 8 years ago.. I left some future in my dipping cup and forgot about it -
and for some reason, rather than tossing the cup, I tried to clean it out. Under
a hard skin of future there was this super thick "goo". I figured that
stuff might come in handy so I put some of it in a paint bottle and have been
using it ever since to attach canopies and other small clear items. It dries
perfectly clear - but isn't as strong a glue (but stronger than you might
imagine).
But usually I just use the crystal watch cement..
Hope this helps make your masking easier.

Regards,
Frank Crenshaw
|
|