|
The majority of my
models lately are displayed in the flying configuration. Over the years, I have
tried different methods while viewing others' displays for ideas, especially
Lyle "Tilt" Katchur's Canadian Hornets. Making modifications to a
model for a stand can be intimidating at first, but once you do a couple and
plan for it in the very beginning, it becomes just another step in building the
model. You may want to practice on a scrap or cheap model to get the hang of it.
I see questions quite a bit on the forums, and hopefully this article will help
shed some light on the methods I use.
Planning
Planning up front is critical as most steps have to be done to the model during
the early phases of building. You don't want to try and make provisions for the
display stand on a completed model. For example, the brass tube supports may
have to be placed before the fuselage is closed up. You can tape the fuselage
together to determine where they should go, and even keep them taped when making
the holes. In fact, in some cases, the holes may go through the exhaust can and
not the fuselage itself.
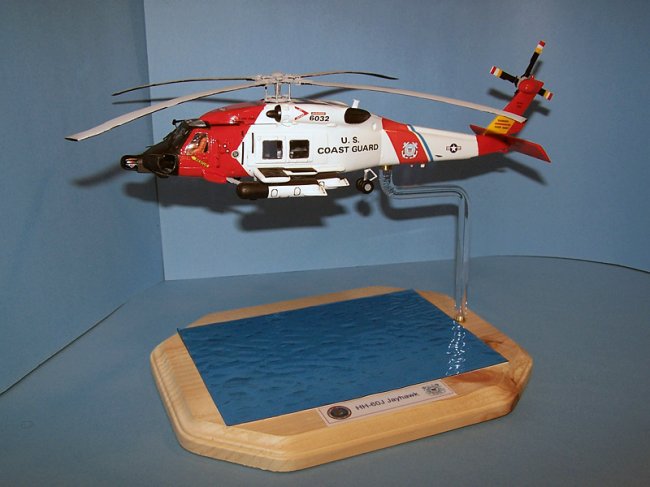
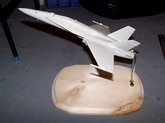
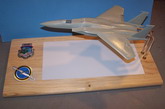
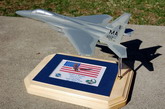
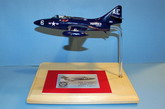
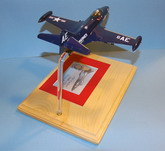
Have a look at the completed samples in this article to give you some ideas of
different styles. Keep in mind, that there are 3 major parts to the display -
the model attachment, the rod style and the base attachment. The don't have
to be done all at the same time. Some other things to decide....
-
Will the rod go into the exhaust nozzle(s) or underneath.
If in the nozzle, be sure the acrylic rod will fit through the nozzle
itself
-
Will the rod be curved
-
What size rod should be used to accommodate the weight
As a rule of thumb, I use the following acrylic rod sizes for:
-
1/72nd : 1/4 inch
-
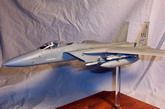
1/48th: 3/8 or 1/2 inch depending on aircraft. F-15s and
A-10s would use 1/2 due to the weight, and a Legacy F/A-18 would use 3/8
due to the size of the exhaust nozzles and lighter weight.
-
1/32nd: I have not done any in this scale, but 1/2 or
larger would be used.
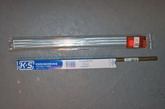
For the brass tube, I use the same size, or slightly larger than
the acrylic rod. The acrylic rod can be sanded to fit small variations if need
be. I think aluminum tubing would suffice as well, and plastic tubing should
work but the wall is thicker to achieve the same strength.
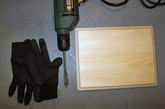
Materials needed:
-
Wood base. I get mine usually from a craft store like
Michaels.
-
Acrylic rod. Plastruct and TAP Plastics are 2 sources I
have used.
-
Brass or aluminum tube. K&S Metals is a brand I have
used.
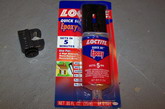
-
5-minute epoxy
-
Razor saw for cutting acrylic rod or aluminum tube
-
Plumber's tube cutter for brass tubing
-
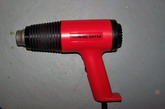
Heat gun, or oven to heat acrylic rod if bending. If a
straight, vertical rod is used, these are not needed
-
Drill for making hole(s) in wood base. Wood-boring bits
are the best for this.
-
Motor tool for making or cleaning up hole(s) in model
-
Candle for heating rod to make hole(s) in model, if using
this method.
-
Measuring tape or ruler
-
Marker
-
Wood glue and wood putty
-
Gloves, cotton ones are the best
-
Wood base finish...paint, varnish, etc
Click on
images below to see larger images
SAFETY PRECAUTIONS
When working with any of the cutting or
heating tools, safety is of the utmost importance. Wear safety glasses when
drilling, and gloves when heating the tube and rod. I once burned my palm when I
grabbed the heated brass tube in an area I thought would have been cool. Read
and follow the heat gun's instructions. If using a candle, be sure have NO
flammable objects nearby including your sleeves, and be sure to have an
extinguisher or water source nearby. Also, the epoxy heats as it cures, and
"shouldn't" harm your model's plastic, but if in doubt, check on a
similar scrap model.
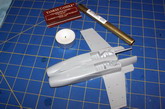
Time to begin
Once I have decided what type of stand and size of rod is needed, I start making
the provisions to the model. I used to drill out the hole in the model, but that
was tedious, and the edges of the plastic could rip off if the drill bit caught
it incorrectly - that happened a few times to me. I now use a candle-heated
brass tube, and plunge it through the plastic. It is much quicker, and cleaner,
with much less cleanup of the hole's edges. Naturally, safety precautions are in
order with the flame at the work bench.
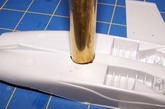
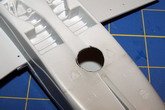
Making the hole(s) in the model
I will show it using the candle method. If you want to use a motor tool or drill
to make it, simply drill the holes where needed using caution with potentially
brittle plastic. I have used increasingly larger sizes of bits until the hole
size is achieved.
-
Have the model ready with the
exact location of the hole(s) to be made.
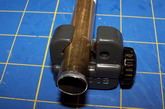
-
Heat the brass tube in the flame
for about a minute. Some smoke may be created, and travel up the tube.
Be
careful, now is not the time to try a peace-pipe.
-
Now take the tube (watch it, it
is HOT), and place it on the spot for the hole, and push while twisting.
Depending how thick the plastic is, and how hot the tube is, it may take a
few tries. If melted plastic gets on the tube, remove it with a knife before
heating it again as the fumes can be pretty bad.
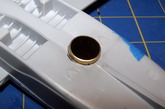
-
Once the hole is made, you can
clean it up with a motor tool and/or sandpaper if needed.
Click on
images below to see larger images
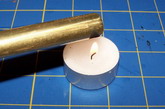
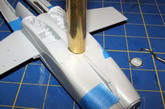
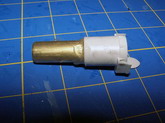
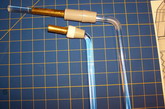
Cutting the tube for the model
Take a piece of the same sized tube
that was used for making the hole, and insert into the hole. Determine how
much of the tube should protrude, and mark a line with a marker. I use a
small plumber's pipe cutter to cut the tube. Mine is slowly getting dull,
and actually collapses the completed opening a bit. I sometimes have to
take a large screwdriver and rotate it around to open it back up a bit to
fit the acrylic rod.
Click on
images below to see larger images
Attaching the tube into the model
I use 5 minute epoxy to secure the
rod. Be careful not to get it on unwanted areas of the model as it will be
hard to remove. I have read you can use baby wipes to remove it, but not
sure if that works when dry. Also, as mentioned above, the epoxy heats as
it cures, and "shouldn't" harm your model's plastic, but if in
doubt, check on a similar scrap model.
Click on
images below to see larger images
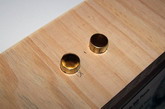
Making the hole(s) in the base
Use a drill and bits to make the hole,
wood boring bits are best. It is important you drill straight down, unless you
are really creative and want to try an angle attachment, but bending the rod is
easier to accomplish than that. If you have access to a drill press, use that. My
drill has a built-in bubble-level to help.
-
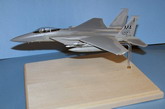
If the model has 2 rods (i.e.,
an F-15, Su-27, etc), use the model to help mark where the holes should go.
I place the model on the wood base, and then try and find the center point
of the model's tube by using a ruler.
-
Otherwise, simply use a ruler
and find the center point of the base for the single hole.
-
Mark the point, and drill the
hole. If you happen to go all the way through the base like I usually do,
you can use wood glue to attach a small piece of cardboard underneath the
holes.
-
Insert a section of tube, and
mark the cut off point with a marker. I usually leave at least a 1/4 inch
protruding out of the base.
-
Use the pipe cutter to cut the
tube.
-
Check the fit, and use wood glue
to secure, and more glue and/or wood putty to finish off.
Click on
images below to see larger images
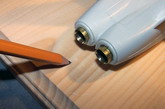
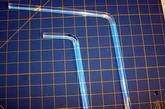
Working with the acrylic rod
If the model will have a straight,
vertical rod, simply measure the length, and cut accordingly. If a curved rod is
needed:
-
Estimate how long of a rod is
needed to include the vertical part, curved part, and part that will go in
the model. To this day, I many times still have to cut one or both ends of
the rod for proper length. I am trying to get better to eliminate waste as
these cuts can sometimes produce tiny sections of acrylic rod. You may want
to make a cardboard template for bending the rod to the curve you'd like.
-
Be sure you have a large, clear
area to work if using the heat gun. If using the oven method, I
unfortunately don't know an exact method for doing that, but have seen some
lay the rod on a cookie sheet and bake. A candle may work, too. However, if
you plan on doing many of these, I suggest getting or borrowing a heat gun.
-
Wearing gloves, heat the rod by
holding the heat gun about 2-3 inches away and rotate the rod. If you are
too close, bubbles can form on the rod. I have had this happen, and most
times doesn't detract from the finished product.
-
The rod will soften and look
"wet", and when ready will slowly start to droop.
-
Now is time to bend the rod.
I
work on my basement's concrete floor, and use this for placing and bending
the rod.
-
Quickly turn off the heat gun
and place the rod down flat, and bend it. Hold it for about 30-60 seconds
until it hardens. It will still be warm for a bit afterwards. If you are
unhappy with the shape, or need to add an additional curve, repeat the
process. I have gotten to point where I can make a single-curved rod in
about 2 minutes.
-
Test fit the rod only if the
glue and epoxy have completely dried.
Click on
images below to see larger images
Wrapping up
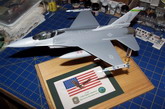
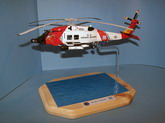
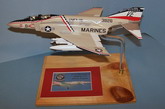
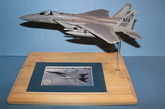
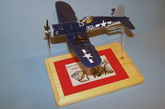
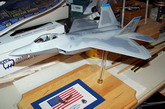
Finish your base to your desired look. I also place 4 soft
"bumpers/cushions" under the base corners so it is a bit elevated, and
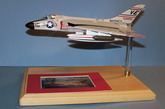
won't scratch its resting surface. Adding some sort of label or patches can make
a nice presentation. Most times I will wrap a small piece of sandpaper around
the protruding tube in the base, and lightly sand it to give a brushed look.
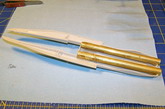
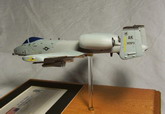
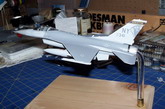
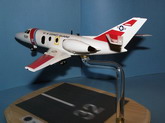
Samples
Click on
images below to see larger images
Summary
Hopefully this article will give you some
confidence to try an in-flight display, or an alternative type of one.
Ken
Middleton
|
|