Scratch Built Cockpit |
||
1/72 Revell Seafire Mk Vb |
||
|
Part 1: Building the Cockpit and adding gull wing effect |
||
|
||
Scratch Built Cockpit |
||
1/72 Revell Seafire Mk Vb |
||
|
Part 1: Building the Cockpit and adding gull wing effect |
||
|
||
|
|
Introduction
Over the last few months, Steve Bamford has been kind
enough to show some of my Spitfire models here on ARC. You may have noticed that
I always said that the cockpits were detailed, undercarriages re-worked etc.
Quite a few folks have asked me for more details of how I go about this. Well,
here goes. Firstly, let me give you a few details of my modelling
philosophy. I (mostly) always add as much detail as I can, especially to the
cockpit. This, to me is the focal point of the model. I tend not to use resin
and photo-etch materials. I have nothing against these items, and have been
known to use them in the past. It is just that I often find that these items are
sometimes made to fit the kit and in view of the moulding limitations of
the kit parts etc., are not always accurate. I also find that I can make
perfectly good replicas using thin plastic sheet (from 5thou upwards), stretched
sprue, wire etc. A really sharp scalpel is needed. I swear by my Swann Morton
scalpel and use the No 11 blade mostly. One of the main advantages of using resin and brass is
the time saving involved. I am reasonably blessed in this respect, as I do not
build to any deadlines, only my own. I also get the satisfaction that it is my
own work, and it is cheaper (don’t forget, I am a Scot!). The
Model
I am trying to build a collection of all the common
versions of the Spitfire (yes, my Merlin series is not yet finished!). I have
always liked the later Seafire variants. The combination of short nose Mk V
airframe, with the four bladed propeller, is one that I like. I have built up a
fair stock of Spitfire parts over the years. This model was based on the Revell
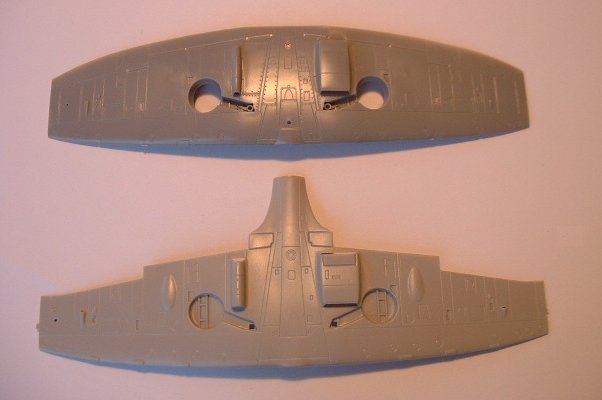
1/72 Mk Vb with parts from various other kits. This kit has nice scribed panel
lines but the most glaring error is the lack of gull wing section, which needs
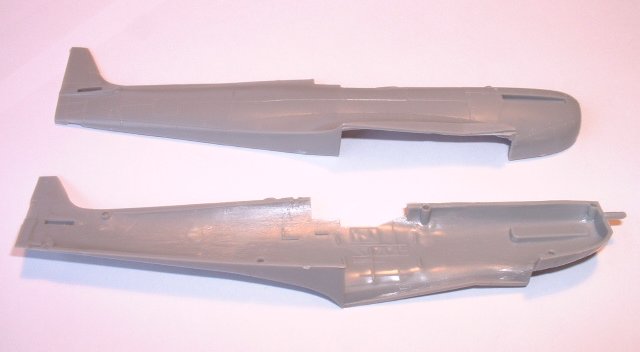
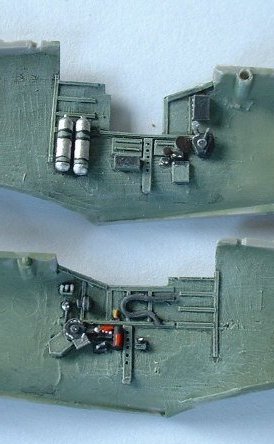
correcting. All will be explained as you read on. This shows the fuselage halves as they come delivered. Note the lack of gull wing and rudimentary sidewall detail.
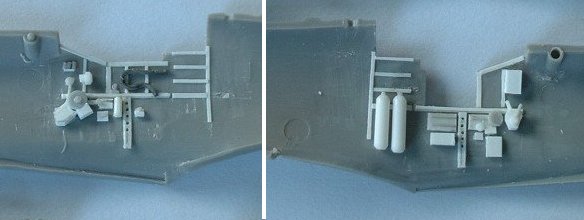
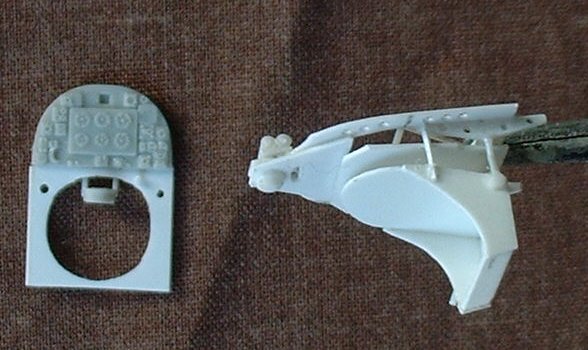
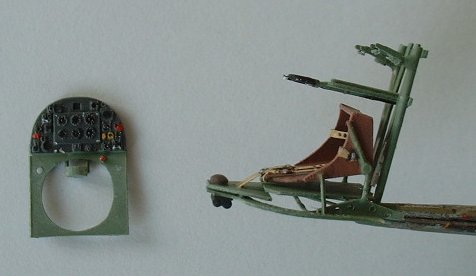
Here is the instrument panel and frame carrying the
seat. I have used an instrument panel from an Academy Mk XIV in this case. The
detail is good and it fit the model nicely. I have build these from scratch
before, using plastic card and various size drills. This saved time on this
occasion. The frame below the panel is from 10 thou. I firstly determined the
width by dry fitting to the fuselage (from below), and then drew in by hand the
shape of the cut out for the pilot’s legs. This was then very carefully cut
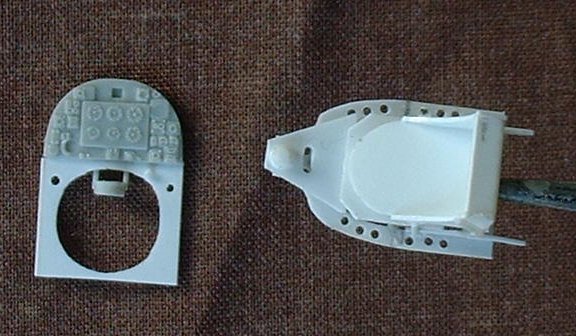
out using a fresh blade. The frame carrying the seat was built in a similar
manner. First determine the width from the fuselage. When the card has been cut
to the correct width, it can then be shaped to fit the upper fuselage contours.
This is done by constant dry fitting, trimming, filing etc. Don’t forget to
shape the frame where it projects above the fuselage sides. When I am satisfied,
I then draw in the shape of the cut out in the middle. Lightening holes are then
drilled around the outside. Then very carefully cut out the centre section,
using a very sharp blade. The upper (triangular) armour plate is added, using a
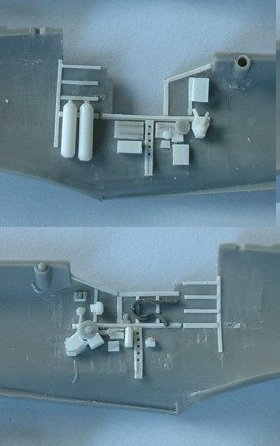
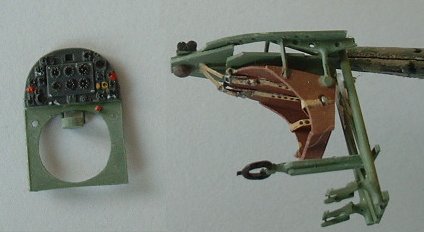
10thou spacer, and the voltage regulator is added from scrap at the rear. The seat was built from 5 thou card, then mounted on a
frame of plastic strip, stretched sprue etc. Sometimes it is better to use CA
adhesive than liquid poly when using such small parts. I apply mine with a
needle mounted in a pin vice. The armour behind the seat is added between the
seat mounting frames. I find excellent reference for the cockpit parts in some
drawings by G A Cox, published by MAP many years ago. Constant trial fitting to
the fuselage is needed during all of these operations.
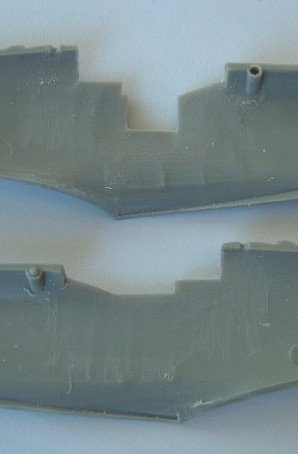
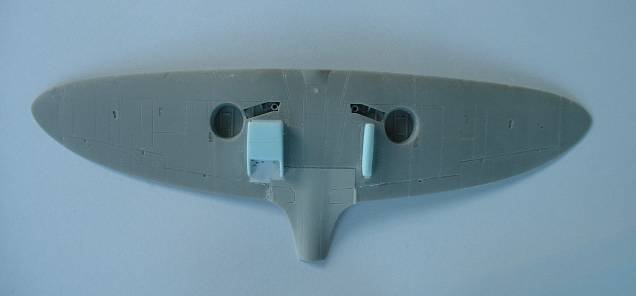
Below we have the lower wing from the kit showing the
lack of gull wing. I used a section from an Italeri Spit kit (seen below) to
replace this. Simply cut out the correct section from the donor part, and a
corresponding section from the Revell wing. Some filling and sanding will be
needed, but nothing too hard.
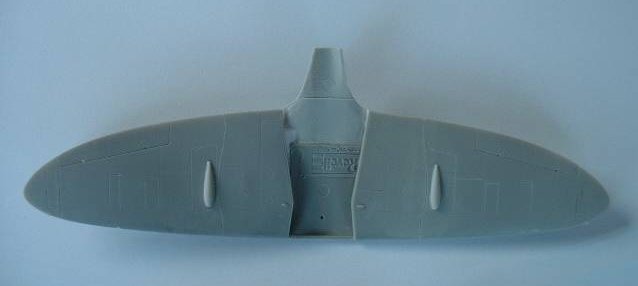
Below is the lower wing with the gull section added. I have also replaced the radiator and oil cooler from Airfix parts. I was not happy with the shape of the kit items. I have also filled all the panel lines relating to the “b” wing, which comes with the kit. I use CA glue as a filler. Easy to apply, spray some accelerator and you are ready to sand. Scribing for the “c” wing panels has also been carried out, along with the wing fold lines.
And so to the upper wings, duly filled and re-scribed
to “c” pattern. Bulges over the cannon bays have also been added, from a
Fujimi kit. These were later modified as I did not like the shape. In hindsight, I could have used a “c “ wing from another kit to save all of the re-scribing, and the gull wing would have been there already. However, all kits with the “c” wing are for later variants (MkIX etc) and have twin radiators. I also had these earmarked for future use!
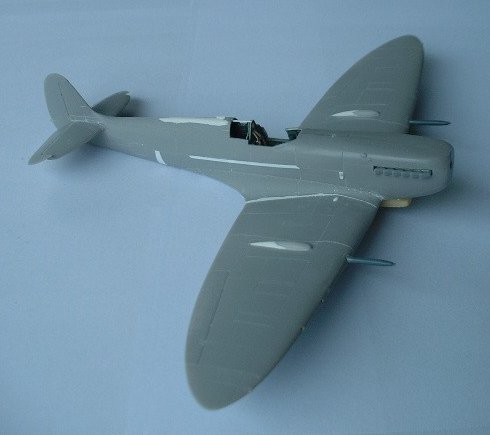
Progress is now being made with the main airframe together. Do not forget to add the cockpit parts before the wing! (been there, done that!). I do not like the shape of the Revell kit’s upper fuselage spine. I slightly reduced it in front of the fin, and added a smear of Miliput just behind the cockpit. Improves the shape immensely. Strengthening strips have been added along the fuselage from 5 thou. The 6 stack exhausts came from a Hasegawa MkIX. Len Thomson
|
|
|||||||||||||||||||||||||||||||||
Photos and text © by Len Thomson