Scratch Built Cockpit |
||
1/72 Revell Seafire Mk Vb |
||
|
Part 2: Finishing the plane |
||
|
||
Scratch Built Cockpit |
||
1/72 Revell Seafire Mk Vb |
||
|
Part 2: Finishing the plane |
||
|
||
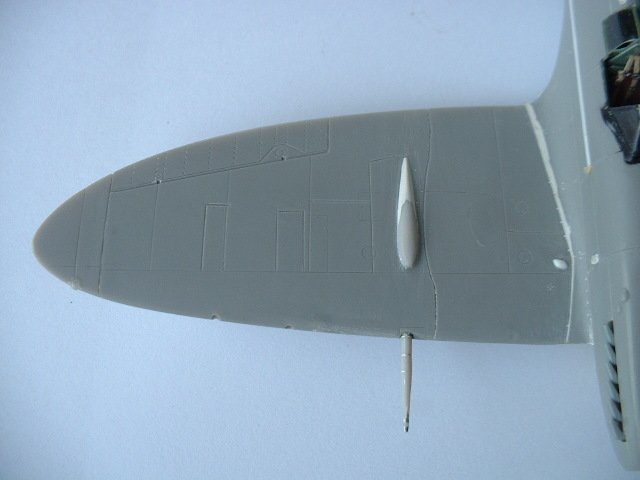
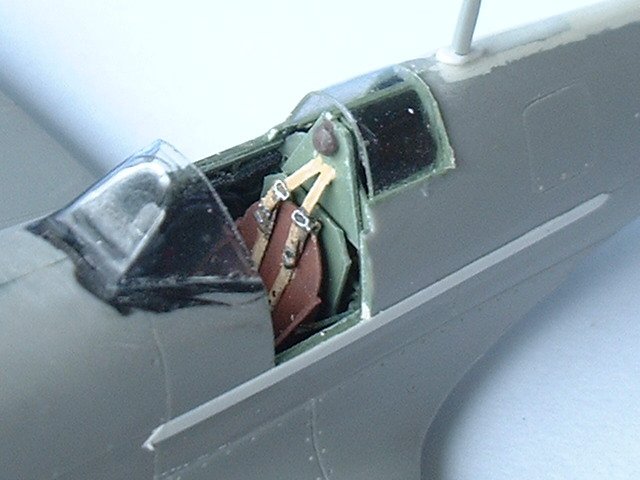
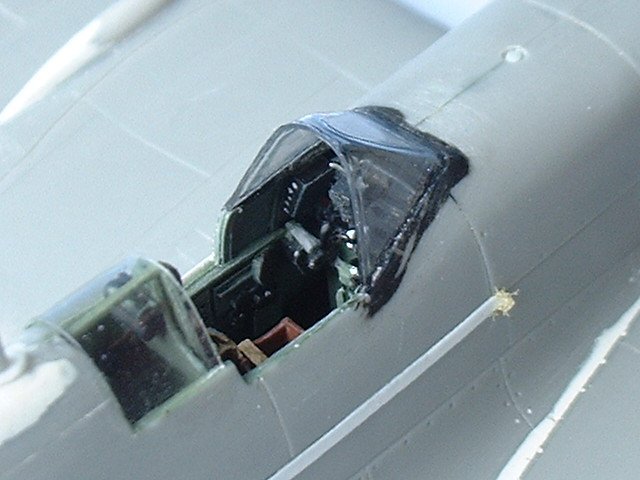
Here are some close-ups of the cockpit parts in place. I have added the gun sight and windscreen. This is a vac form item from Falcon. The best in the business!
|
Click on images below to see larger images |
|
 |
 |
|
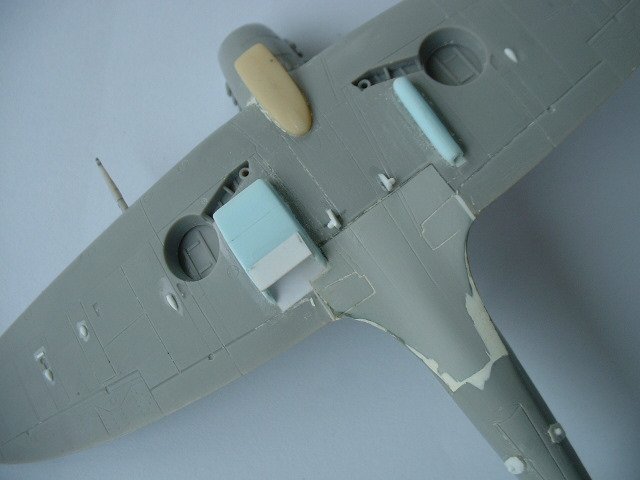
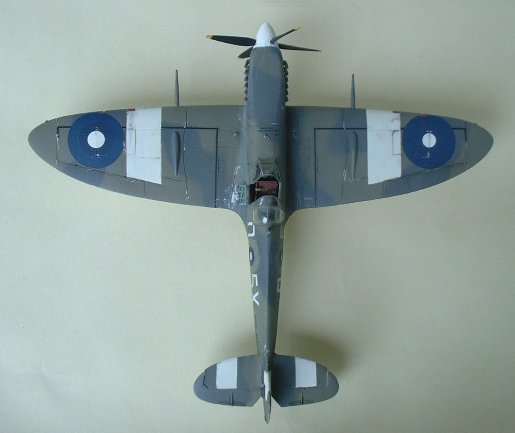
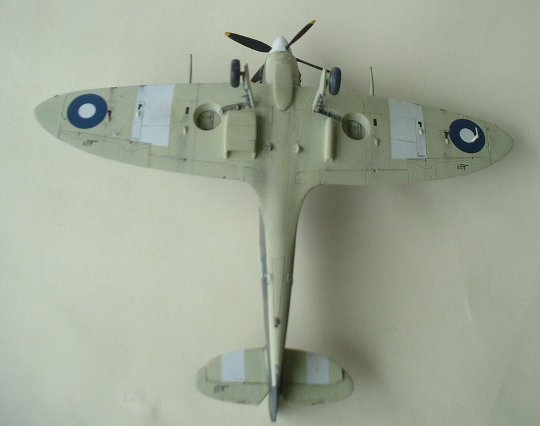
Here is the underside of the model showing some further details added. The air filter is a resin item found in the spare box. This can also be found in the Hasegawa MkIX and some other kits. Various details have been added, including the catapult spools, tiny bulges behind the spent cartridge chutes etc. You will also see that I have scribed in the “A” frame arrestor hook.
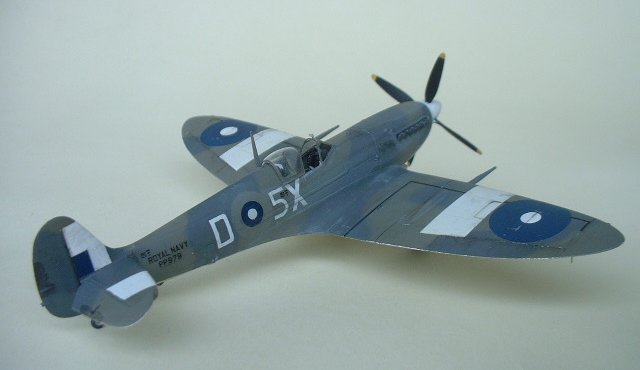
The upper wing. As mentioned, I was not happy with the shape of the cannon bulges. They came from a Fujimi Mk XIV and did not seem long enough. I added a little Miliput to the rear of them and sanded to shape. I still think they are a little too broad.
Sorry for being slightly out of focus (pic below left). Painting is well underway. I prime with Halfords acrylic auto primer. The white theatre bands were sprayed first and masked off. The camouflage is Sky under surfaces, Humbrol, with Dark Slate Grey and Extra Dark Sea Grey uppers. I used Xtracolour for the DSG and Humbrol for the EDSG. The pattern was masked with home made masks cut from paper and attached with Blu Tac. This gives a nice spacing from the surface and a nice tight feathering. There has been some discussion lately that such feathering should not be visible in 1/72. I tend to agree, but feel that the tight feathering helps to “blend” the two colours. The aircraft modelled had the original fuselage roundels over painted. I did this by masking out the circles and spraying a slightly lighter shade of DSG. A couple of coats of Future have been applied.
Completed
Model
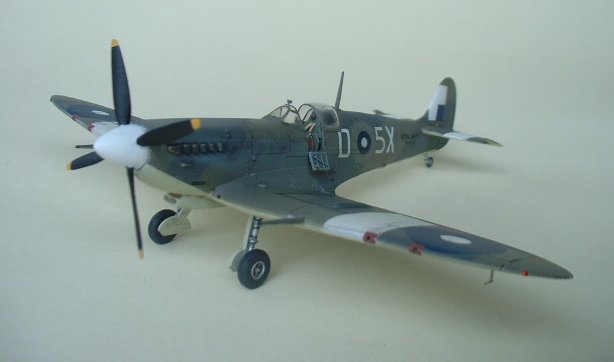
The
four bladed prop came from my vast spares box, and I am not sure about it’s
origins. I think it came from an old Matchbox Spit IX. The spinner I think is
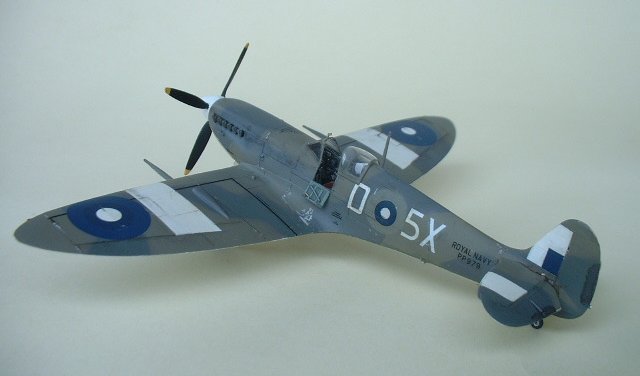
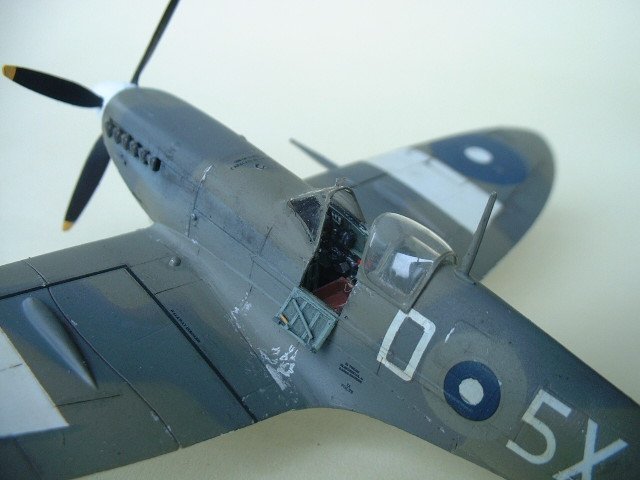
Italeri. The model represents a Seafire III, PP279 from 807 Sqn Fleet Air Arm,
on HMS Hunter, in June 1945. Sadly, this aircraft missed the arrestor wires and
hit the barriers after a sortie and was written off. After having decided which
scheme to finish the model in, it was time to source the decals. There were no
aftermarket sets for this aircraft so they came from a variety of sources, which
I had in stock. The upper wing roundels had unusual proportions. I sourced these
from an Aeromaster sheet for Far East Spits. The proportions were made by
overlaying small roundels on top of standard size items. Codes and serials came
from Modeldecal sheets. The “5” in the code was of an unusual pattern and
had to be made from other letters, cut into pieces. The cartridge ejector chutes
were also represented by black decals. When all decaling was complete, I gently
weathered the model with Carrs Weathering Powders. A final coat of Xtracolour
Matt varnish finished the project. A
note on the tools used
When
I first suggested a full build article to Steve, he asked that I include some
details of the tools I use. I have nothing out of the ordinary. I have referred
to the Swann Morton scalpel before. I also use a pin vice with various drill
sizes (from 0.3mm upwards), files, wet and dry paper etc. Scribing is done with
old school dividers against a very flexible straight edge.
Below is a look at the finished cockpit in the finished plane Len Thomson
|
|
|||||||||||||||||||||
Photos and text © by Len Thomson